When it comes to large complicated models it is essential to reduce the model training time as much as possible, and utilise the available hardware efficiently. Even small gains per batch or epoch are very important.
Mixed precision training can both significantly reduce GPU RAM utilisation, as well as speeding up the training process itself, all without any loss of precision in the outcome.
This article will show (with code examples) the sort of gains that can actually be attained, whilst also going over the requirements to use mixed precision training in your own models.
Introduction #
The first half of this article is aimed at giving an overview of what mixed precision is, and when, why and how to use it.
The second half goes through the results of a comparison between 'normal' and mixed precision training on a set of dummy images. The images are trained through a multi-layer Conv2D neural network in TensorFlow, and both RAM usage and execution speed are monitored throughout.
All the code relevant to the comparison is available in a colab notebook ![]()
What exactly is mixed precision? #
Before we dive into what mixed precision is, it is probably a good idea to outline what we are referring to when we say 'precision' in this particular context.
Precision in this case is basically referring to how a floating point number is stored i.e. how much space it takes up in memory. The smaller the memory footprint, the less accurate the number. There are basically three options:
- Half precision - 16-bit (float16) - low level of storage used to represent number, low level of accuracy
- Single precision - 32-bit (float32) - medium level of storage used to represent number, medium level of accuracy
- Double precision - 64-bit (float64) - high level of storage used to represent number, high level of accuracy
Typically with machine learning / deep learning and neural networks, you will be dealing with single precision 32-bit floating point numbers.
Image by InspiredImages from Pixabay
However, in almost all cases it is possible for calculations to be run using 16-bit floating point numbers instead of 32-bit floating point numbers, without any degradation of the accuracy of the model.
Mixing precisions #
The ideal, and simplest solution, is to use a mixture of 16-bit and 32-bit floating point numbers. Calculations can be run as fast as possible using lower precision 16-bit floating point numbers, and then the inputs and outputs can be stored as 32-bit floating point variables to ensure a high level of accuracy is preserved and there are no compatibility issues on the output.
This combination is what is referred to as 'Mixed Precision'.
Why should I use mixed precision? #
There are two main reasons:
- There will be a significant improvement in GPU RAM usage. The difference can be as much as 50% less GPU RAM utilisation
- There can be a significant speed up in time taken to run through the model
Using mixed precision in TensorFlow could:
improve performance by more than 3 times on modern GPUs and 60% on TPUs
The RAM usage reduction alone is a big deal. This will allow larger batch sizes to be utilised, or open the door to larger and more intensive models being possible on the same hardware.
We will of course see actual results for these two factors in the comparison later in the article.
What are the requirements to use mixed precision? #
For mixed precision training to be an advantage you will need one of the following:
- A Nvidia GPU with compute compatibility of 7.0 or above (you can get more details on 'compute compatibility' and why Nvidia specifically in my previous article here.)
- A TPU (Tensor Processing Unit)
Although you can use other GPUs for mixed precision, and it will run. You won't gain any real speed improvements without the items detailed above. However, if you are only looking for gains in RAM usage then it may still be worth it.
Older GPUs offer no math performance benefit for using mixed precision, however memory and bandwidth savings can enable some speedups.
When should I use mixed precision? #
The simple answer to this question is almost all the time, as the advantages greatly outweigh the disadvantages in most cases.
The only thing to note is that if your models are relatively uncomplicated and small, you will likely not realise the difference. The larger and more complicated the models get, the more significant an advantage mixed precision is.
How do I use mixed precision? #
In TensorFlow it is extremely easy, I'm not that familiar with PyTorch, but I can't imagine it would be particularly difficult to implement either.
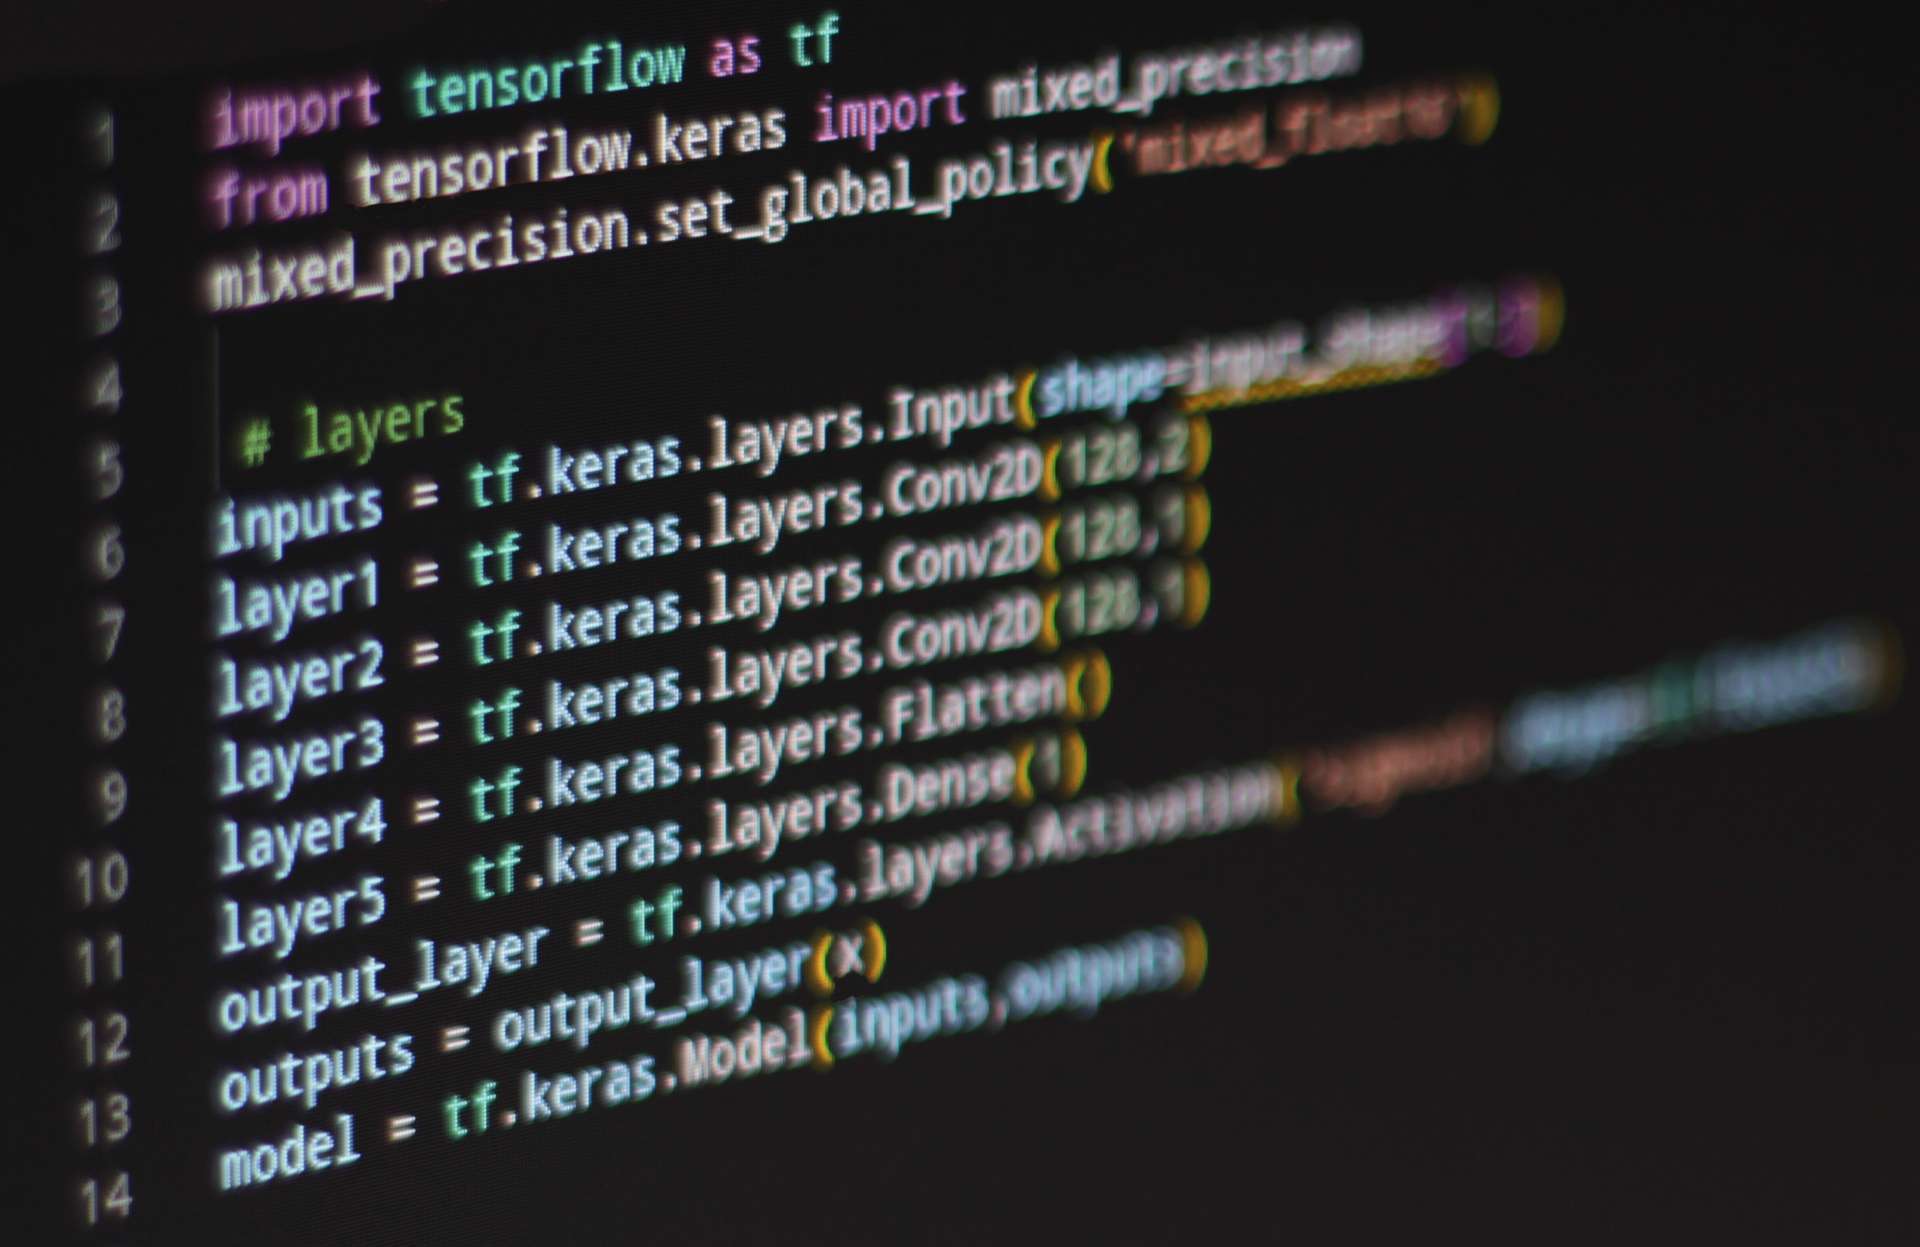
from tensorflow.keras import mixed_precision
mixed_precision.set_global_policy('mixed_float16')
...and that's it.
The only caveat to the above is that you should ensure that the inputs and outputs of the model are always float32. The inputs will likely be in float32 anyway, but just to be sure you can implicitly apply the dtype. For example:
images = tf.random.uniform(input_shape, minval=0.0, maxval=1.0, seed=SEED, dtype=tf.float32)To ensure your output from your model is in float32, you can separate out the activation of the last layer of your model. For example:
# Simple layer stack using the funcitonal API with separated activation layer as output

layer1 = tf.keras.layers.Conv2D(128,2)(inputs)
layer2 = tf.keras.layers.Conv2D(128,1)(layer1)
layer3 = tf.keras.layers.Conv2D(128,1)(layer2)
layer4 = tf.keras.layers.Flatten()(layer3)
layer5 = tf.keras.layers.Dense(1)(layer4)
output_layer = tf.keras.layers.Activation('sigmoid', dtype=tf.float32)(layer5)
Custom training loops #
Applying mixed precision to your models really is a simple as described in the previous section.
However, if you are in a situation where you are not using 'model.fit' because you are implementing your own training loop, then there are a few more steps to be aware of as you have to manually deal with loss scaling.
If you use
tf.keras.Model.fit, loss scaling is done for you so you do not have to do any extra work. If you use a custom training loop, you must explicitly use the special optimizer wrappertf.keras.mixed_precision.LossScaleOptimizerin order to use loss scaling.
This is important as float16 values are prone to 'underflow' and 'overflow' due to the smaller storage available compared to float32. All this essential means is that:
values above 65504 will overflow to infinity and values below 6.0×10⁻⁸ will underflow to zero.
To avoid this a strategy called loss scaling is utilised to mitigate this problem. For a deeper understanding I suggest taking a look at the mixed precision guide on tensorflow.org.
TPUs #
If you are lucky enough to have access to a dedicated TPU (Tensor Processing Unit) then it is just worth noting that you should be using data type ''bfloat16" rather than "float16".
It is no harder to implement, and doesn't suffer from the loss scaling problem as mentioned in the previous section.
from tensorflow.keras import mixed_precision
mixed_precision.set_global_policy('mixed_bfloat16')
A practical example #
As an example of the potential gains, I have made available a colab notebook ![]() so that you can see the benefits for yourself. There are some notes at the beginning of the notebook in relation to the GPU you must use, so please make sure you read those to get the most out of the notebook.
so that you can see the benefits for yourself. There are some notes at the beginning of the notebook in relation to the GPU you must use, so please make sure you read those to get the most out of the notebook.
I will go through the outcomes from this notebook in the following subsections.
The data #
The data is random uniform noise formatted into the shape of a batch of images.
# create dummy images based on random data
SEED = 12
tf.random.set_seed(SEED);
total_images = 800
input_shape = (total_images, 256, 256, 3) # (batch, height, width, channels)
images = tf.random.uniform(input_shape, minval=0.0, maxval=1.0, seed=SEED, dtype=tf.float32)
It is important to note that I have explicitly set the data type to be float32. In this case it would have made no difference as this is the default for the function. However, this may not always be the case depending on where your data comes from.
An example image looks as follows:
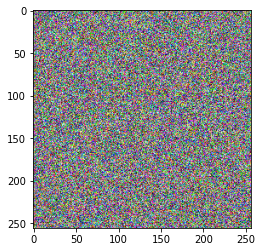
Image by author
I also created random binary labels so that the model can be a binary classification model.
labels = np.random.choice([0, 1], size=(total_images,), p=[0.5,0.5])The model #
The model has been chosen to be simple, but complicated enough to use a reasonable amount of RAM, and have a decent batch run time. This ensures that any differences between the mixed precision and 'normal' run are distinguishable. These are the layers of the model:
layer1 = tf.keras.layers.Conv2D(128,2)
layer2 = tf.keras.layers.Conv2D(128,1)
layer3 = tf.keras.layers.Conv2D(128,1)
layer4 = tf.keras.layers.Flatten()
layer5 = tf.keras.layers.Dense(1)
output_layer = tf.keras.layers.Activation('sigmoid',dtype=tf.float32)
Again, take note that the output activation layer is cast to float32. This makes no difference on the 'normal' run, but is essential for the mixed precision run.
The test #
The model mentioned in the previous section was run using the following parameters:
- total images = 800
- image size = 256 x 256
- batch size = 50
- epochs = 10
Overall run time and epoch runtime #
The images are then run through once using the timeit module to get an overall run time.
The epoch run times are also printed.
GPU RAM usage #
To get GPU RAM usage information the following function is used:
tf.config.experimental.get_memory_info('GPU:0')This outputs the current and peak GPU RAM usage. Before each run the peak usage is reset and compared to the current GPU RAM usage (they should therefore be the same). Then at the end of the run the same comparison is made. This allows the calculation of the actual GPU RAM used during the run.
The Results #
Single precision (float32) model:
Epoch 1/10
16/16 [==============================] - 10s 463ms/step - loss: 90.4716 - accuracy: 0.5038
Epoch 2/10
16/16 [==============================] - 8s 475ms/step - loss: 9.1019 - accuracy: 0.6625
Epoch 3/10
16/16 [==============================] - 8s 477ms/step - loss: 1.6142 - accuracy: 0.8737
Epoch 4/10
16/16 [==============================] - 8s 475ms/step - loss: 0.2461 - accuracy: 0.9488
Epoch 5/10
16/16 [==============================] - 8s 482ms/step - loss: 0.0486 - accuracy: 0.9800
Epoch 6/10
16/16 [==============================] - 8s 489ms/step - loss: 0.0044 - accuracy: 0.9975
Epoch 7/10
16/16 [==============================] - 8s 494ms/step - loss: 7.3721e-05 - accuracy: 1.0000
Epoch 8/10
16/16 [==============================] - 8s 497ms/step - loss: 1.4208e-05 - accuracy: 1.0000
Epoch 9/10
16/16 [==============================] - 8s 496ms/step - loss: 1.2936e-05 - accuracy: 1.0000
Epoch 10/10
16/16 [==============================] - 8s 490ms/step - loss: 1.1361e-05 - accuracy: 1.0000

RAM INFO:

Current: 0.63 GB, Peak: 9.18 GB, USED MEMORY FOR RUN: 8.55 GB

TIME TO COMPLETE RUN: 79.73
Mixed precision (mixed_float16) model:
Epoch 1/10
16/16 [==============================] - 15s 186ms/step - loss: 71.8095 - accuracy: 0.5025
Epoch 2/10
16/16 [==============================] - 3s 184ms/step - loss: 15.2121 - accuracy: 0.6000
Epoch 3/10
16/16 [==============================] - 3s 182ms/step - loss: 4.4640 - accuracy: 0.7900
Epoch 4/10
16/16 [==============================] - 3s 183ms/step - loss: 1.1157 - accuracy: 0.9187
Epoch 5/10
16/16 [==============================] - 3s 183ms/step - loss: 0.2525 - accuracy: 0.9600
Epoch 6/10
16/16 [==============================] - 3s 181ms/step - loss: 0.0284 - accuracy: 0.9925
Epoch 7/10
16/16 [==============================] - 3s 182ms/step - loss: 0.0043 - accuracy: 0.9962
Epoch 8/10
16/16 [==============================] - 3s 182ms/step - loss: 7.3278e-06 - accuracy: 1.0000
Epoch 9/10
16/16 [==============================] - 3s 182ms/step - loss: 2.4797e-06 - accuracy: 1.0000
Epoch 10/10
16/16 [==============================] - 3s 182ms/step - loss: 2.5154e-06 - accuracy: 1.0000

RAM INFO:

Current: 0.63 GB, Peak: 4.19 GB, USED MEMORY FOR RUN: 3.57 GB

TIME TO COMPLETE RUN: 42.16
I think that is fairly conclusive:
| Data Type | Epoch run time [s] | Overall run time [s] | GPU RAM Usage [GB] |
|---|---|---|---|
| float32 | 8 | 79.73 | 8.55 |
| mixed_float16 | 3 | 42.16 | 3.57 |
| Improvement | Almost 3x faster | Almost 2x faster | Less than half the RAM usage |
One thing you may note in the above results is that the initial epoch for the mixed precision run takes five times longer than the subsequent epochs, and even longer than the float32 run. This is normal, and is due to the optimisations that TensorFlow runs at the start of the learning process. However, even with this initial deficit, it doesn't take long for the mixed precision model to catch up and surpass the float32 model.
The longer initial epoch for mixed precision also helps to illustrate why smaller models may not see the benefits, as there are initial overheads that need to be overcome to realise the advantages of mixed precision.
This also happens to serve as a great example of overfitting. Both methods managed to achieve 100% accuracy on completely random data with completely random labels!
The future #
The trend for lower precision calculations seems to be gaining traction, as with the latest generations of GPUs from Nvidia there are now implementations such as TensorFloat-32, which:
automatically uses lower precision math in certain float32 ops such as
tf.linalg.matmul.
It is also the case that:
TPUs do certain ops in bfloat16 under the hood even with the default dtype policy of float32
As such, as time goes on it may not be necessary to actually implement mixed precision directly as it will all be taken care of under the hood.
However, We are not there yet, so for now it is still worth the effort to consider utilising mixed precision training.
Conclusion #
The only conclusion to draw is that mixed precision is an excellent tool to speed up training, but more importantly free up GPU RAM.
Hopefully, this article has helped you get a grasp of what mixed precision is all about, and I would encourage you to have a play around with the colab notebook to see if it fits your particular requirements, and get a feel for the benefits it could bring.
🙏🙏🙏
Since you've made it this far, sharing this article on your favorite social media network would be highly appreciated. For feedback, please ping me on Twitter.
...or if you want fuel my next article, you could always:

Published